AT Microsoft Word There is a mass of convenient page settings for both reading and printing. In this program, you can change the orientation of pages from portrait to landscape — in some cases changing a vertical sheet to a horizontal one can be very convenient, for example, when you want to print a large horizontal ad or place a wide spreadsheet on a sheet. Make in Word horizontal sheet landscape orientation absolutely easy.
Is this a text field? Did you double click on it? It works if you have one of the new versions. Although their design is very characteristic, we can personalize them completely by uploading our own graphics and images. This application is mainly intended for users who are not developers and who need a quick and cheap solution for creating slides, invitations or images to upload to the blog.
Then they understood the potential of the tool and worked on expanding it into an online application. Since they started testing their beta, and for more than a year of development, the company has been able to raise more than $ 3 million in funding to launch the product.
Instruction
Rate this article!
Creating a document in Microsoft Word, we can choose the portrait (vertical) orientation of the sheet or landscape (horizontal).
You do not need to pay anything to use it, you just need to register, first you will find a small tutorial on how to make your first design, and nothing more, everything is ready to begin. This is a type of license in which you pay only once for the resource you are going to use, as many times as you want. This makes it much more attractive than image sale systems.
In addition, for this purpose, they asked to collaborate with photographers, illustrators and professional designers to expose their work, thereby creating a new market for their creations. An attractive clean interface that intuitively allows us to first access the template menu at the top.
By default, the page in the Word is vertically. Therefore, people who are faced with the need to create album sheet for the first time, the question naturally arises how to turn a page horizontally in a Word.
The algorithm of actions to perform this task will vary depending on the version of Word installed on your computer. Consider how to flip the sheet horizontally in Word, taking into account the main software versions.
Finally, at the top of the carousel pattern, we have the option “Use custom dimensions”, which allows us to set our own dimensions for the new design. At the bottom of the first screen, under the templates, we find an area dedicated to our projects. Those that we have already done, that are under review, or that we have left as templates suitable for future use.
After we have selected our templates, we will change the screen, and the window divided into the left column and the workspace on the right. From the sidebar, we can access the “Layouts” tab, where we will find the project templates. They vary with the choices we made at the beginning.
Microsoft Word 2003
- In the menu item "File" choose "Page Settings".
- A dialog box appears. Click on the "Fields".
- Find the title "Orientation", select "Landscape".
The goal is achieved!
We have considered how to make an album list in Word 2003, and now we will learn how to make an album sheet in Word 2007.
A search engine appears at the top, where we can search for more than a thousand photos in the image bank. By simply placing the courses, we will find different categories to choose from. Below the “Layouts” tab there is a text, here we find texts that were previously developed in the most different formats which, of course, we can change at our discretion.
And finally, the “Download” tab to load our own elements into the design. One of interesting features The application is that it saves our images or elements that we uploaded to be able to reuse them in another design.
Microsoft Word 2007
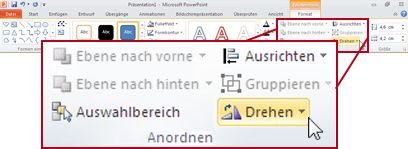
- Select the Page Layout tab in the main menu.
- Click on the "Orientation" button in the "Page Setup" command group, select "Landscape".
Done! Before us is a sheet located horizontally.
“Having completed the steps described above, you change the orientation of all sheets in the Word document. But there are cases when it is necessary to turn only a certain page. Knowing the basic rules of how to make a landscape sheet in a Word, you can easily cope with this task.
As soon as we selected a template, we show it in the central field. All template elements are individually selected. Both images and text are placed in overlapping layers. At the bottom of the middle frame we have a long button “Add new page , Which allows us to create a new design page. We respect the backstory of our previous design.
In the right field there is another series of icons indicating the number of the slide and the possibility of cloning the design to a new one. Finally, buttons appear at the top of this area. sharing and publications and may upload, our design, directly to our social network .
First you need to select the desired sheet (s) or a piece of text. Then open the Page Layout tab (if you have Word 2007 installed) and click on the small square with the arrow in the lower right corner of the Page Settings command group. A dialog box will open. Find the heading “Sample” and in the list “Apply” select “To selected text”. If you are using Word 2003, you will find a similar list of “Apply” in the “Fields” dialog box (Oleg, advanced PC user).
Selection of various design elements
One of the properties that surprised me the most was the ability to change various elements of a composition. If you look at an image when you select text, it looks like the top bar, which allows us to change the font, size, color, erase or set the link and align the text.
Other details that make this application one of the universal ones are image taking, automatically when we release them in design. The text also automatically adapts when we write. All the luxury options, perfectly optimized.
Is this a text field?Did you double click on it?